
Travertine Pavers: The Complete Guide to Costs, Installation & Maintenance (2026)
Travertine Pavers: The Complete Guide to Costs, Installation & Maintenance (2026)
Last Updated: February 2026 | Expert Guide by CMHA Certified Installers | 12 min read
Travertine pavers have become the gold standard for Florida pool decks, patios, and outdoor living spaces—and for good reason. This natural stone offers unmatched elegance, stays cooler than concrete in scorching summer heat, and ages beautifully over decades.
But here's what most homeowners don't know: not all travertine is created equal, and improper installation can turn a $20,000 investment into a $30,000 nightmare.
As CMHA Certified Paver Installers who've completed hundreds of travertine projects across Central Florida, we've seen both stunning successes and costly failures. This comprehensive guide gives you everything you need to make informed decisions about travertine pavers—from understanding quality grades to calculating real costs to avoiding installation disasters.
Let's make you a travertine expert.
What Are Travertine Pavers?
Travertine is a natural sedimentary stone formed by mineral deposits from hot springs and limestone caves. It's been used in construction for thousands of years—the Roman Colosseum was built with travertine over 2,000 years ago and still stands today.
Modern travertine pavers are:
Cut and finished natural stone tiles
Available in various sizes (typically 6x12", 12x12", 16x16", 24x24")
Multiple finish types (tumbled, brushed, honed, filled/unfilled)
Sourced primarily from Turkey, Mexico, and Peru
Available in cream, ivory, beige, walnut, and silver color families
Why travertine dominates Florida outdoor spaces:
✅ Stays 20-30°F cooler than concrete or dark pavers in direct sun
✅ Natural slip resistance when tumbled or brushed
✅ Timeless Mediterranean aesthetic that never goes out of style
✅ Increases home value significantly (70-90% ROI)
✅ Extremely durable when properly installed (50+ year lifespan)
✅ Low maintenance compared to wood or composite decking
Travertine Paver Cost: Real Numbers for Central Florida (2026)
Let's discuss actual costs with complete transparency.
Cost Per Square Foot (Material Only):
Premium Grade (Our Recommendation):
Standard tumbled: $6-9 per sq ft
French pattern (mixed sizes): $7-10 per sq ft
Large format (16x24" or 24x24"): $8-12 per sq ft
Premium grades (minimal variation): $10-15 per sq ft
Mid-Grade:
Standard tumbled: $4-6 per sq ft
French pattern: $5-7 per sq ft
Visual variation/inconsistency: Moderate to high
Budget Grade (Not Recommended):
Standard tumbled: $3-5 per sq ft
High variation, thinner pavers, poor durability
Often cracks or deteriorates within 5-7 years in Florida climate
Complete Installation Cost Per Square Foot:
Professional Installation (What You'll Actually Pay):
Pool Deck Installation: $18-28 per sq ft installed
Material: $6-10/sq ft
Base preparation: $4-6/sq ft
Labor & installation: $6-8/sq ft
Sealing: $1-2/sq ft
Edge restraint/coping: $2-3/sq ft
Patio Installation: $16-25 per sq ft installed
Material: $6-10/sq ft
Base preparation: $3-5/sq ft
Labor & installation: $5-7/sq ft
Sealing: $1-2/sq ft
Edge restraint: $1-2/sq ft
Driveway Installation: $20-30 per sq ft installed
Material: $7-12/sq ft (thicker pavers required)
Reinforced base: $5-7/sq ft
Labor & installation: $6-8/sq ft
Sealing: $1-2/sq ft
Edge restraint: $1-2/sq ft
Complete Project Cost Examples:
Small Pool Deck (400 sq ft):
Budget: $6,400-8,000
Premium: $9,000-11,200
Medium Pool Deck (600 sq ft):
Budget: $10,800-13,200
Premium: $13,800-16,800
Large Pool Deck (900 sq ft):
Budget: $16,200-19,800
Premium: $20,700-25,200
Standard Patio (300 sq ft):
Budget: $4,800-6,000
Premium: $6,300-7,500
Large Patio (600 sq ft):
Budget: $9,600-12,000
Premium: $12,600-15,000
Complete Outdoor Living (Pool Deck + Patio, 1,200 sq ft):
Budget: $21,600-28,800
Premium: $28,800-33,600
Additional Costs to Consider:
Travertine coping (pool edge): $30-50 per linear foot
Bullnose edge (rounded): $35-60 per linear foot
Steps/landings: $500-2,000 per step (depending on size)
Drainage improvements: $800-3,000
Outdoor kitchen paver base: $2,000-5,000
Walkway extensions: $16-25 per sq ft
Paver lighting: $100-300 per light fixture
Types of Travertine Pavers: Understanding Your Options
1. Tumbled Travertine ⭐ Most Popular for Florida
What it is: Edges are tumbled/weathered for an aged, rustic appearance
Characteristics:
Slightly rough, textured surface
Rounded, worn edges
Natural slip resistance
Authentic Mediterranean look
Hides imperfections well
Best for:
Pool decks (best slip resistance)
High-traffic patios
Outdoor kitchens
Rustic/Mediterranean designs
Cost: $6-9 per sq ft (material)
Our take: This is our #1 recommendation for 80% of Florida pool decks. The texture provides excellent slip resistance when wet, and the aged appearance looks intentionally rustic rather than worn.
2. Brushed Travertine ⭐ Best Balance of Smooth & Safe
What it is: Surface mechanically brushed for light texture
Characteristics:
Smoother than tumbled
Slightly textured for traction
Clean, contemporary look
Straighter edges than tumbled
Good slip resistance
Best for:
Modern designs
Indoor/outdoor transitions
Covered patios
Those who want smoother feel with safety
Cost: $7-10 per sq ft (material)
Our take: Perfect middle ground between honed (too smooth) and tumbled (too rustic). Great for contemporary homes.
3. Honed Travertine
What it is: Smooth, matte finish without texture
Characteristics:
Very smooth surface
Minimal slip resistance
Elegant, refined appearance
Shows scratches more easily
Best for covered areas
Best for:
Covered patios
Indoor floors
Low-traffic areas
Formal designs
Cost: $8-12 per sq ft (material)
WARNING: We strongly advise against honed travertine for pool decks or uncovered patios in Florida. It becomes dangerously slippery when wet.
4. Filled vs. Unfilled Travertine
Filled Travertine:
Natural holes/pits filled with color-matched resin
Smoother surface
Less maintenance
Better for barefoot traffic
Standard for most applications
Unfilled Travertine:
Natural holes/pits left open
More authentic appearance
Requires more cleaning (debris in holes)
Can catch heels or toes
Popular for rustic designs
Our recommendation: Filled travertine for 95% of residential applications. Unfilled looks beautiful but creates maintenance headaches.
Travertine Paver Sizes & Patterns
Standard Sizes:
Small Format:
6x6" (uncommon, mainly accents)
6x12" (popular for borders)
Medium Format:
12x12" (most common, versatile)
12x24" (modern, elongated look)
Large Format:
16x16" (contemporary)
16x24" (dramatic, fewer seams)
24x24" (ultra-modern, statement pieces)
Popular Layout Patterns:
1. French Pattern (Most Popular) ⭐
Mix of 8x8", 8x16", 16x16", and 16x24"
Random, natural appearance
Hides imperfections
Traditional European look
Cost: 10-15% more than standard (extra labor)
2. Running Bond
Rectangular pavers (12x24") offset by 50%
Similar to subway tile
Contemporary appearance
Easy installation
3. Herringbone
45° or 90° angled pattern
Classic, sophisticated
Excellent interlock (great for driveways)
15-20% more labor cost
4. Versailles Pattern
Complex, random pattern
Ultra-high-end appearance
Requires skilled installer
20-30% premium for labor
5. Stacked/Grid
Straight lines, no offset
Modern, minimalist
Shows imperfections more
Easiest installation (lowest labor cost)
Our recommendation: French pattern for classic designs (60% of our projects), running bond for contemporary (30%), herringbone for driveways and high-end patios (10%).
Travertine vs. Other Paver Materials: The Complete Comparison
Travertine vs. Concrete Pavers
Feature Travertine Concrete Pavers Temperature Stays 20-30°F cooler Gets very hot in sun Appearance Natural, unique Manufactured, uniform Lifespan 50+ years 25-30 years Maintenance Low (seal every 3-5 years) Low (seal every 2-3 years) Cost $18-28/sq ft installed $12-18/sq ft installed Color Fade Minimal (natural stone) Moderate over time Slip Resistance Excellent (tumbled) Good to excellent Resale Value Higher Moderate
Winner: Travertine for pool decks and high-end applications. Concrete pavers for budget projects.
Travertine vs. Porcelain Pavers
Feature Travertine Porcelain Pavers Temperature Stays cooler Can get hot Appearance Natural variation Manufactured consistency Lifespan 50+ years 25-40 years Maintenance Seal every 3-5 years Minimal sealing Cost $18-28/sq ft installed $20-35/sq ft installed Stain Resistance Good (when sealed) Excellent Authenticity Real stone Manufactured Installation Standard Requires pedestal system or mortar
Winner: Travertine for authentic natural stone look and better value. Porcelain for ultra-low maintenance modern designs.
Travertine vs. Brick Pavers
Feature Travertine Brick Pavers Temperature Stays cooler Gets hot Appearance Elegant, luxurious Traditional, rustic Lifespan 50+ years 50+ years Cost $18-28/sq ft installed $15-22/sq ft installed Style Mediterranean, upscale Classic, colonial Slip Resistance Excellent Good
Winner: Travertine for pool decks and luxury spaces. Brick for traditional/colonial architecture.
Travertine vs. Stamped Concrete
Feature Travertine Stamped Concrete Temperature Stays much cooler Gets very hot Appearance Authentic stone Imitation (obvious up close) Lifespan 50+ years 15-25 years Cost $18-28/sq ft $12-18/sq ft Maintenance Low High (reseal annually, cracks) Repair Easy (replace individual pavers) Difficult (entire section) Cracking Individual pavers flex Cracks are common
Winner: Travertine by a landslide. Stamped concrete is budget-friendly initially but rarely lasts 15+ years in Florida without significant issues.
Our honest opinion: We actively discourage stamped concrete for Florida pool decks. The cost savings aren't worth the cracking, heat, and maintenance issues.
Why Travertine Pavers Stay Cooler: The Science
This is the #1 question we get: "Why is travertine cooler than concrete?"
The Technical Answer:
1. Light Color & High Albedo
Travertine reflects 40-60% of sunlight
Concrete reflects only 20-30%
Darker surfaces absorb more heat
2. Natural Porosity
Travertine's porous structure allows air circulation
Evaporative cooling effect
Concrete is denser and retains more heat
3. Thermal Mass Properties
Travertine has lower thermal conductivity
Doesn't absorb and hold heat like concrete
Cools down faster when sun sets
Real-World Temperature Testing (Florida Summer, 2pm):
Ambient air temperature: 95°F
Dark concrete pavers: 145-155°F
Standard concrete: 130-140°F
Brick pavers: 125-135°F
Light concrete pavers: 120-130°F
Travertine (ivory/beige): 105-115°F
Translation: Travertine is typically 20-30°F cooler than standard concrete and 30-40°F cooler than dark pavers.
Can you walk barefoot? On most summer afternoons, travertine is comfortable. Concrete and dark pavers are not.
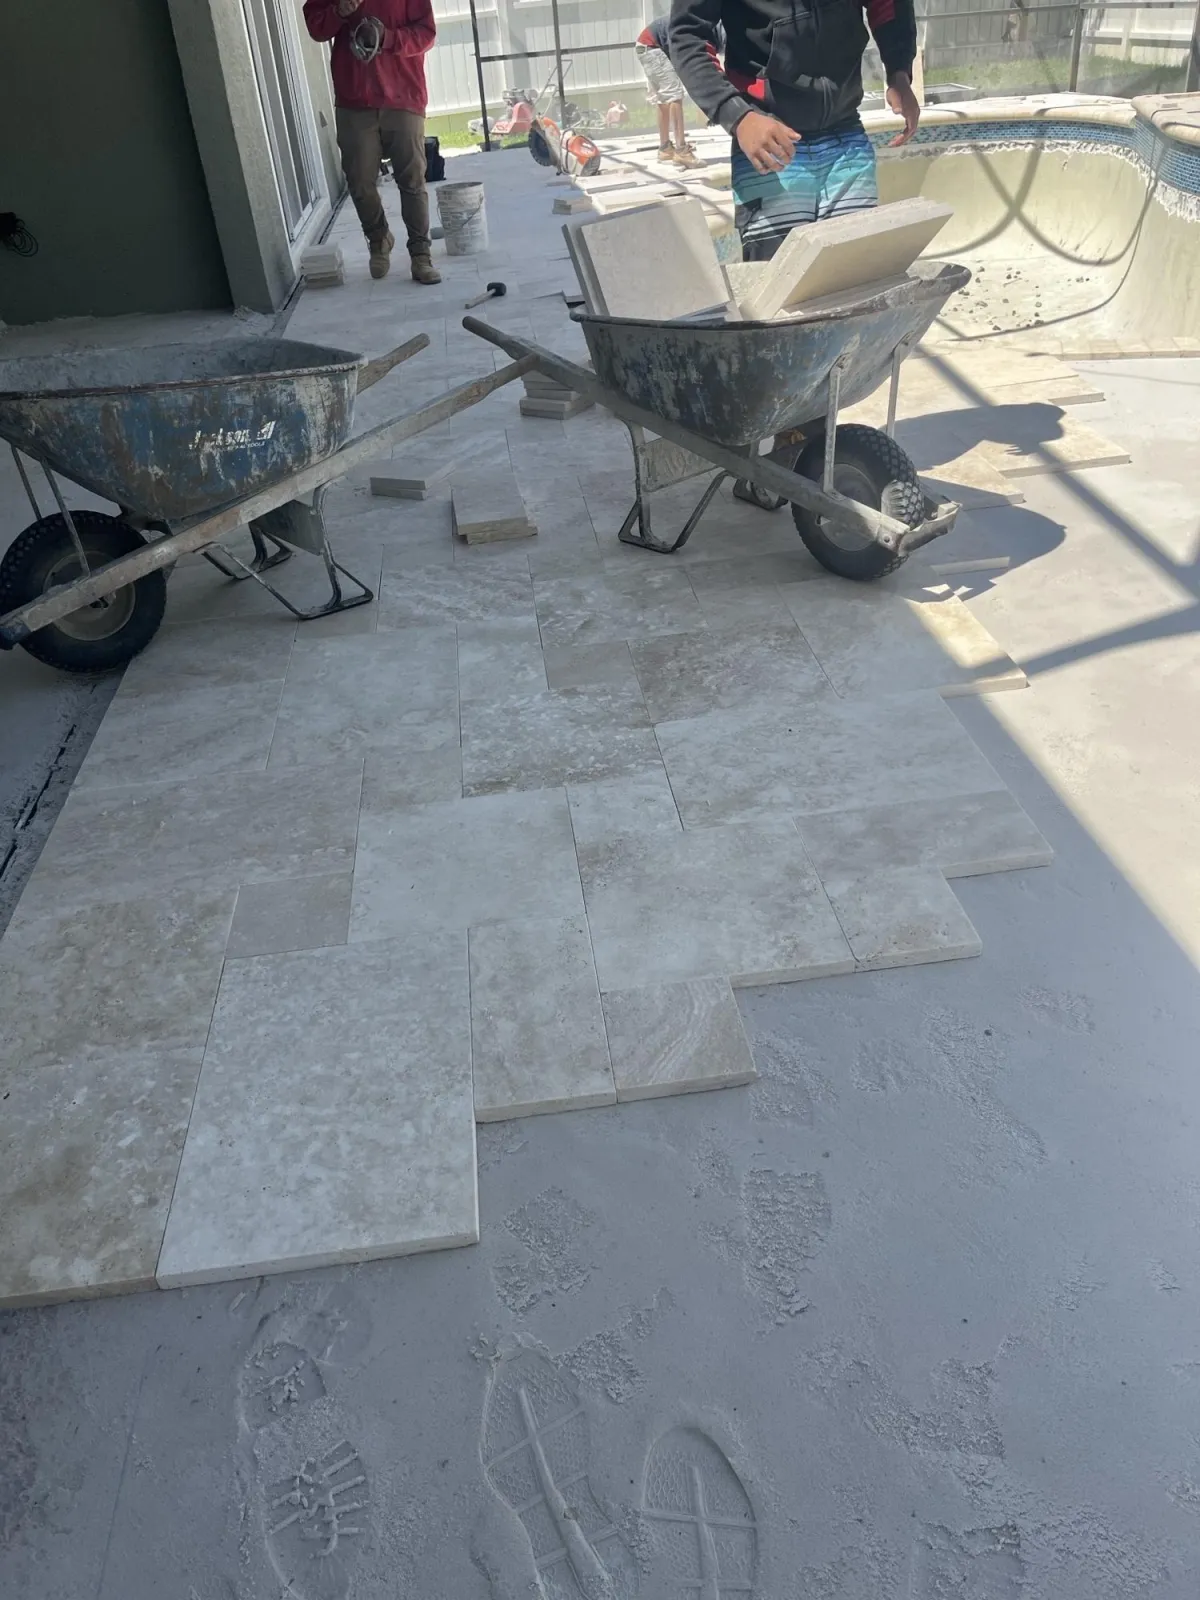
Travertine Paver Installation: The Process & What Can Go Wrong
Proper installation is 60% of travertine's longevity. Here's what separates quality work from disasters waiting to happen.
Step 1: Site Preparation & Excavation (CRITICAL)
Proper method:
Remove existing surface (grass, old concrete, pavers)
Excavate 8-10 inches below desired finished height
Assess and address drainage issues
Remove roots, debris, organic material
Grade for proper drainage slope (minimum 1-2%)
Common mistakes:
Insufficient excavation (causes settling)
Ignoring drainage (creates standing water)
Installing over old concrete without proper prep
Not addressing root systems near trees
Red flag: Contractors suggesting minimal excavation "to save money."
Step 2: Base Layer Installation (FOUNDATION OF SUCCESS)
Proper method:
Install 4-6 inches of crushed limestone aggregate (#57 stone)
Compact in 2-inch lifts with plate compactor
Achieve 95%+ compaction
Grade precisely for drainage
Create smooth, level surface
Why it matters: The base is your pavers' foundation. Poor compaction = settling = uneven pavers = trip hazards = cracking.
Common mistakes:
Using wrong aggregate (sand, pea gravel, dirt)
Insufficient compaction
Too thin base layer (3 inches or less)
Single-pass compaction instead of lifts
Inadequate edge restraint
Quality indicator: Professional installers compact in lifts and use proper equipment. DIYers and budget contractors often skip this.
Step 3: Bedding Layer (LEVELING COURSE)
Proper method:
Install 1 inch of concrete sand (not mason sand or beach sand)
Screed to perfect level using rails
Compact lightly
Provides final adjustment for level
Common mistakes:
Using wrong sand type
Too thick (over 1.5 inches)
Too thin (under 0.75 inches)
Poor leveling
Step 4: Paver Installation (CRAFTSMANSHIP SHOWS HERE)
Proper method:
Start from fixed reference (building, pool edge)
Maintain consistent joint spacing (typically 1/8" to 1/4")
Cut pavers precisely to fit edges
Mix pavers from multiple pallets (color consistency)
Use wet saw with diamond blade for cuts
Check level frequently
Common mistakes:
Starting from wrong location
Inconsistent joint spacing
Poor cut quality (chipped edges)
Not mixing pallets (color banding)
Using improper cutting tools
Quality indicator:
Straight, consistent joints
Clean cuts at edges
Pavers from multiple pallets mixed
No lippage (edges even)
Step 5: Edge Restraint (PREVENTS SPREADING)
Proper method:
Install heavy-duty plastic edge restraint or concrete curbing
Secure with 10-inch spikes every 12 inches
Use flexible restraint for curves
Install before filling joints
Why it matters: Without proper edge restraint, pavers spread over time, creating gaps and uneven surfaces.
Common mistakes:
Skipping edge restraint entirely
Using inadequate restraint (garden edging)
Insufficient spike spacing
Not addressing curves properly
Step 6: Joint Filling (LOCKS PAVERS TOGETHER)
Proper method:
Use polymeric sand (NOT regular sand)
Sweep sand into joints multiple times
Ensure joints are 85-90% filled
Remove excess from surface
Activate with light misting (polymeric sand)
Allow to cure per manufacturer instructions
Polymeric sand benefits:
Hardens when wet
Prevents weed growth
Resists washout in heavy rain
Locks pavers together
Reduces ant colonies
Common mistakes:
Using regular sand (washes out)
Overfilling or underfilling joints
Improper activation of polymeric sand
Applying in rain or extreme heat
Step 7: Compaction (FINAL SETTING)
Proper method:
Run plate compactor over entire surface
Multiple passes
Ensures pavers are seated in bedding layer
Locks joints
Creates stable surface
Common mistakes:
Skipping compaction
Insufficient passes
Using improper equipment
Step 8: Sealing (PROTECTION & ENHANCEMENT)
Proper method:
Clean surface thoroughly
Wait 3-7 days after joint filling
Apply penetrating sealer (our recommendation)
Follow manufacturer instructions
Two coats for best results
Sealer types:
Penetrating (our recommendation): Protects without changing appearance
Color-enhancing: Deepens color, adds slight sheen
High-gloss: Wet look (rarely used on outdoor travertine)
Benefits of sealing:
Stain resistance (oil, food, wine)
Easier cleaning
Protects against efflorescence
Slows weathering
Enhances color (if using enhancing sealer)
Cost: $1-2 per sq ft
Re-seal frequency: Every 3-5 years for penetrating sealers
Common Travertine Installation Failures (And How to Avoid Them)
We've corrected dozens of failed travertine installations. Here are the most common disasters:
Failure #1: Settling & Uneven Surfaces
Cause:
Inadequate base preparation
Poor compaction
Insufficient base depth
Installing over unsuitable soil
Result:
Pavers sink in spots
Trip hazards develop
Water pooling
Eventually requires complete reinstallation
Fix: Proper base (6+ inches), 95% compaction, addressing soil conditions.
Cost to repair: $8,000-15,000 for typical pool deck (essentially complete reinstallation)
Failure #2: Standing Water & Drainage Issues
Cause:
Inadequate slope
Poor drainage planning
Settling creating low spots
Ignoring water flow patterns
Result:
Water pools on surface
Algae growth
Mosquito breeding
Accelerated deterioration
Slip hazards
Fix: Proper 1-2% slope, drainage channels, addressing water sources.
Failure #3: Paver Spreading & Joint Gaps
Cause:
No edge restraint
Inadequate edge restraint
Using regular sand instead of polymeric
Poor joint filling
Result:
Gaps between pavers widen
Sand washes out
Weeds grow
Pavers become loose
Trip hazards
Fix: Install proper edge restraint, refill with polymeric sand.
Cost to repair: $2,000-5,000 depending on extent.
Failure #4: Efflorescence (White Haze/Residue)
Cause:
Natural salts in stone
Moisture moving through pavers
Improper sealing
Poor drainage
Result:
White, chalky appearance on surface
Looks dirty or damaged
More common in first 1-2 years
Fix: This is normal and temporary. Clean with efflorescence remover, ensure proper sealing.
Prevention:
Seal pavers properly
Ensure good drainage
Allow efflorescence to occur naturally before sealing
Failure #5: Cracking or Chipping
Cause:
Using budget-grade thin pavers
Inadequate base support
Heavy vehicle traffic on residential-grade pavers
Improper installation around pool equipment
Result:
Individual pavers crack
Edges chip
Requires paver replacement
Fix: Replace damaged pavers (benefit of pavers vs. stamped concrete).
Prevention: Use appropriate thickness (1.25" for residential, 2" for driveways).
Travertine Paver Maintenance: Easier Than You Think
One of travertine's biggest advantages is low maintenance—when properly installed and sealed.
Weekly Maintenance (5 minutes):
✅ Sweep or blow debris
Remove leaves, dirt, pollen
Prevents staining
Keeps surface clean
✅ Rinse high-traffic areas
Garden hose is fine
Removes surface dirt
Monthly Maintenance (15 minutes):
✅ Deep cleaning
Mild soap and water
Soft brush or mop
Rinse thoroughly
✅ Spot treat stains
Address spills promptly
Use appropriate cleaner for stain type
Annual Maintenance (1-2 hours or hire professional):
✅ Professional cleaning ($200-500)
Pressure washing (low pressure!)
pH-neutral cleaner
Remove built-up grime
✅ Inspect and address issues
Check for loose pavers
Look for drainage problems
Assess joint sand levels
Every 3-5 Years:
✅ Re-seal travertine ($1-2 per sq ft or DIY)
Clean thoroughly first
Apply penetrating sealer
Protects and extends life
What NOT to Do:
❌ High-pressure washing (damages surface, removes joint sand) ❌ Acidic cleaners (etches stone) ❌ Bleach or harsh chemicals ❌ Metal shovels or scrapers (scratches surface) ❌ Salt or de-icers (not common in FL, but damaging)
Stain Removal Guide:
Oil/grease stains:
Poultice with baking soda paste
Commercial degreaser for stone
Repeat if necessary
Rust stains:
Rust remover for natural stone
Never use CLR or acidic cleaners
Organic stains (leaves, berries):
Hydrogen peroxide solution
Mild bleach solution (diluted, rinse thoroughly)
Wine/food stains:
Immediate blotting (don't rub)
Mild soap and water
Poultice if needed
Sealing: Yes or No?
Our recommendation: YES, always seal travertine.
Benefits:
Stain protection
Easier cleaning
Prevents efflorescence
Extends lifespan
Maintains appearance
Sealer types we recommend:
Penetrating/impregnating sealers (best for most applications)
Brands: Miracle 511, TileLab, Aqua Mix
When to seal:
After installation (wait 3-7 days)
Every 3-5 years thereafter
After aggressive cleaning
DIY or professional?
Small areas (under 500 sq ft): DIY friendly
Large areas: Consider professional ($1-2/sq ft)
Travertine Pavers for Pool Decks: The Perfect Choice
Travertine has become the default choice for Florida pool decks. Here's why:
Temperature Benefits:
The barefoot test: On a 95°F day in direct sun:
Travertine: Warm but comfortable (105-115°F)
Concrete: Too hot to walk barefoot (130-140°F)
Dark pavers: Dangerously hot (145-155°F)
Why this matters: Pool decks are barefoot zones. Travertine is the only material that stays comfortable in Florida summer heat.
Safety Benefits:
✅ Slip resistance when wet (tumbled or brushed finishes)
✅ No standing water (properly installed)
✅ Won't crack like concrete (flexible joints)
✅ Cool enough to prevent burns
Aesthetic Benefits:
✅ Timeless Mediterranean look
✅ Complements any pool color
✅ Natural variation creates interest
✅ Ages beautifully (doesn't look dated)
Practical Benefits:
✅ Saltwater pool compatible (unlike some materials)
✅ Chemical resistant when sealed
✅ Easy repairs (replace individual pavers)
✅ No fading (natural stone color)
Pool Deck Design Considerations:
Size recommendations:
Standard: 4-6 feet around pool perimeter
Comfortable: 6-8 feet (allows furniture)
Luxurious: 8-12 feet (full lounging area)
Pattern recommendations:
French pattern: Most popular (60% of projects)
Large format running bond: Modern aesthetic
Herringbone: Traditional elegance
Color recommendations for pools:
Ivory/cream: Brightest, coolest, shows less dirt
Beige/tan: Warm, hides dirt well
Walnut/noce: Dramatic contrast (gets warmer)
Silver/gray: Contemporary, stays relatively cool
Coping options:
Travertine bullnose: Seamless look, comfortable edge
Drop-edge coping: Traditional, clean line
Step-down coping: Accommodates raised beam pools
Travertine Paver Grades: Understanding Quality Differences
Not all travertine is equal. Understanding grades helps you avoid overpaying or buying inferior products.
Premium Grade (Our Recommendation)
Characteristics:
Consistent color and pattern
Minimal variation between pavers
Few natural holes/pits
Calibrated thickness (uniform)
Dense, durable stone
Source: Usually Turkish or premium Mexican
Cost: $8-15 per sq ft (material)
Best for:
High-end homes
Featured spaces
Formal designs
Perfectionist homeowners
Standard/Commercial Grade (Most Common)
Characteristics:
Moderate color variation
Some natural holes/pits (filled)
Generally consistent
Slight thickness variation (±2-3mm)
Good durability
Source: Turkey, Mexico, Peru
Cost: $6-9 per sq ft (material)
Best for:
Most residential applications
Pool decks
Patios
Standard projects
Our recommendation: This is what we use for 70% of projects. Excellent value and quality.
Economy/Builder Grade (Buyer Beware)
Characteristics:
Significant color variation
Many holes/pits (may be poorly filled)
Thickness inconsistencies (±5mm)
Possible structural defects
Lower density (more porous)
Source: Often unknown or mixed sources
Cost: $3-5 per sq ft (material)
Problems:
Lippage (uneven edges)
Cracks easier
Shorter lifespan
Difficult to achieve quality appearance
Our opinion: False economy. The $2-3/sq ft savings ($2,400-3,600 on an 1,200 sq ft deck) isn't worth the headaches, shorter lifespan, and appearance issues.
How to Identify Quality Travertine:
Look for: ✅ Consistent color within each pallet ✅ Uniform thickness (measure multiple pavers) ✅ Dense, solid feel (not lightweight/porous) ✅ Well-filled holes (if filled) ✅ Clean, straight edges ✅ Reputable supplier/manufacturer
Red flags: ❌ Dramatic color variation within same lot ❌ Thickness varies by 5mm+ ❌ Lightweight/extremely porous ❌ Poorly filled holes (falling out) ❌ Chipped or damaged edges ❌ "Too good to be true" pricing ❌ Unknown or suspicious origin
Travertine Pavers vs. Travertine Tiles: What's the Difference?
Travertine Pavers:
Thickness: 1.25" to 2"
Outdoor applications
Can be installed on aggregate base
Tumbled/brushed finishes
More durable/impact resistant
Travertine Tiles:
Thickness: 0.5" to 0.75"
Indoor applications primarily
Require mortar/thin-set installation
Often honed/polished finishes
Less impact resistant
Can you use tiles outdoors?
Not recommended for pavers
Can be used on concrete surfaces with mortar
Must be slip-resistant finish
Less durable than pavers
Is Travertine Right for Your Project?
Travertine is PERFECT for:
✅ Pool decks (our #1 recommendation) ✅ Patios and outdoor living areas ✅ Walkways and paths ✅ Outdoor kitchen surrounds ✅ Fire pit areas ✅ Driveways (with proper thickness) ✅ Mediterranean/tropical design styles ✅ Luxury homes ✅ Homes with existing travertine ✅ Anyone prioritizing comfort and coolness
Consider carefully if:
⚠️ Extremely tight budget (concrete pavers may be better value) ⚠️ Ultra-modern minimalist design (porcelain might fit better) ⚠️ Heavily wooded area (falling acorns can stain) ⚠️ You're unwilling to seal every 3-5 years
Travertine is NOT ideal for:
❌ Areas with heavy vehicle traffic (use thicker commercial pavers) ❌ Extreme modern designs (might prefer concrete/porcelain) ❌ If you want zero maintenance (nothing is zero maintenance)
Travertine Paver ROI: Does It Add Home Value?
Short answer: Yes, significantly.
Appraised Value Impact:
Quality travertine installations typically:
Add 70-90% of installation cost to home value
$20,000 travertine pool deck = $14,000-18,000 value increase
Why the strong ROI:
Perceived luxury
Low maintenance appeal
Increased outdoor living space
Temperature/comfort benefits
Timeless aesthetic
Market Appeal:
Travertine appeals to buyers who value:
Luxury finishes
Low maintenance
Outdoor living
Pool enjoyment
Mediterranean aesthetic
Real estate agent feedback: "Travertine pool decks are consistently mentioned positively in showings. It's one of those features buyers notice and appreciate immediately, especially in Florida where outdoor living is year-round."
Best Practices for Home Value:
✅ Use premium materials ✅ Professional installation only ✅ Keep maintenance records ✅ Proper sealing before listing ✅ Clean thoroughly for showings ✅ Highlight in listing (photos + description)
How to Choose a Travertine Paver Installer
Installation quality determines whether your $20,000 investment lasts 50 years or fails in 5.
Must-Have Credentials:
1. Valid Florida contractor license
CGC (Certified General Contractor) or
Hardscape/Paver specialty license
Verify at MyFloridaLicense.com
2. Insurance coverage
General liability ($1M+ recommended)
Workers' compensation
Request certificates
3. Industry certifications
CMHA Certified (Concrete Masonry & Hardscapes Association)
ICPI Certified (Interlocking Concrete Pavement Institute)
Manufacturer certifications
4. Experience
Minimum 5 years travertine-specific experience
50+ completed projects
Central Florida experience (understands climate)
Red Flags:
❌ No license or "getting licensed soon" ❌ Can't provide insurance certificates ❌ Pressure to sign immediately ❌ Requires 50%+ deposit upfront ❌ Significantly lower bid than competitors ❌ Vague about installation process ❌ Won't provide references ❌ No written warranty
Interview Questions:
"How many travertine pool decks have you installed in the past year?"
"What thickness base do you use and why?"
"How do you ensure proper drainage?"
"What happens if pavers settle in the first year?"
"Do you provide written warranty on workmanship?"
"Can I see 5-10 photos of completed projects?"
"Can you provide 3-5 recent customer references?"
Quality Indicators in Quotes:
Good quotes include: ✅ Specific travertine grade/source ✅ Paver size and pattern ✅ Base depth specification (6+ inches) ✅ Drainage plan ✅ Edge restraint details ✅ Polymeric sand specified ✅ Sealing included or optional ✅ Timeline ✅ Payment schedule (30% deposit max) ✅ Warranty terms ✅ Itemized costs
Red flags in quotes: ❌ "Travertine pavers" without specifics ❌ Vague base preparation description ❌ No drainage mention ❌ Regular sand instead of polymeric ❌ Total price only (no breakdown) ❌ Requires large upfront payment ❌ No warranty mentioned
Frequently Asked Questions About Travertine Pavers
How much do travertine pavers cost installed in Florida?
Professional travertine paver installation in Central Florida typically costs $18-28 per square foot for pool decks and $16-25 per square foot for patios. This includes material ($6-10/sq ft), base preparation ($4-6/sq ft), labor ($6-8/sq ft), and sealing ($1-2/sq ft).
Do travertine pavers get hot in Florida sun?
Travertine stays 20-30°F cooler than concrete and 30-40°F cooler than dark pavers. In 95°F weather, travertine typically reaches 105-115°F (warm but walkable barefoot), while concrete reaches 130-140°F (too hot). This makes travertine the best choice for Florida pool decks.
How long do travertine pavers last?
Premium travertine pavers properly installed last 50+ years in Florida. The stone itself is virtually indestructible—ancient Roman structures built with travertine still stand 2,000 years later. Base preparation and installation quality determine longevity more than the stone itself.
Do travertine pavers need to be sealed?
Yes, sealing is strongly recommended. Sealed travertine resists stains, cleans easier, and maintains appearance longer. Use penetrating sealers every 3-5 years. Sealing costs $1-2 per square foot and can be DIY or professional.
Are travertine pavers slippery when wet?
Tumbled and brushed travertine provide excellent slip resistance when wet, making them ideal for pool decks. Honed (smooth) travertine can be slippery and should be avoided for pool areas. Always choose tumbled or brushed finish for safety.
Can you pressure wash travertine pavers?
Use low pressure only (under 1500 PSI). High-pressure washing can damage the surface, remove joint sand, and etch the stone. For routine cleaning, garden hose pressure with mild soap is sufficient. Professional cleaning every few years is recommended.
What is the best pattern for travertine pavers?
French pattern (mixed sizes) is most popular for its natural, European appearance and is used in 60% of installations. Running bond offers a contemporary look. Herringbone provides traditional elegance and superior interlock for driveways. Pattern choice depends on design style and application.
How thick should travertine pavers be?
Standard thickness is 1.25 inches for residential pool decks and patios. Use 2-inch thickness for driveways and heavy vehicle traffic. Thicker pavers are more durable and less likely to crack but cost 30-50% more.
Can travertine pavers be installed over concrete?
Yes, but proper preparation is critical. The concrete must be structurally sound, clean, and sloped for drainage. Installation requires mortar or sand bed depending on condition. This method saves excavation costs but isn't suitable for damaged or poorly draining concrete.
How do you clean travertine pavers?
Regular maintenance: sweep weekly, rinse with hose. Deep cleaning: use pH-neutral cleaner with soft brush, rinse thoroughly. Annual professional cleaning recommended. Avoid acidic cleaners, bleach, and high-pressure washing. Seal every 3-5 years for easy maintenance.
The Bottom Line: Is Travertine Worth the Investment?
After installing travertine pavers on hundreds of Central Florida properties, our unbiased assessment:
For pool decks: Absolutely yes. Nothing else stays as cool, looks as timeless, or performs as reliably in Florida heat.
For patios and outdoor living: Yes for most homeowners. The comfort, appearance, and longevity justify the premium over concrete pavers—especially in luxury homes.
For driveways: Yes, if budget allows. Beautiful and durable, but requires 2-inch pavers and premium installation.
The key: Use premium materials and hire certified installers. Budget travertine poorly installed is worse than quality concrete pavers properly installed.
Expected lifespan: 50+ years when properly installed and maintained.
The investment makes sense if:
You value outdoor living comfort
You appreciate natural materials
You plan to stay 7+ years (or care about resale)
You want low-maintenance luxury
You entertain outdoors frequently
Get Expert Travertine Paver Installation in Central Florida
Ready to transform your outdoor space with beautiful, cool, comfortable travertine pavers? Daydream Outdoor Living brings certified expertise, premium materials, and meticulous installation to every project.
Why Choose Daydream Outdoor Living:
✅ CMHA Certified Paver & Hardscape Installers
✅ Licensed Florida Contractor (CPC1460885)
✅ 10+ Years Central Florida Experience
✅ Premium Travertine Only (we don't install budget-grade materials)
✅ Proper Installation (6+ inch base, polymeric sand, edge restraint—every time)
✅ Transparent Pricing (detailed quotes with no surprises)
✅ Workmanship Warranty (we stand behind our installations)
✅ Complete Outdoor Solutions (combine with pools, turf, outdoor kitchens)
Ready to transform your outdoor space? Call Daydream Outdoor Living at (321) 353-6164 for a free consultation. As Central Florida's licensed and certified outdoor living experts (CPC1460885), we specialize in custom pools, resurfacing, artificial turf, pavers, and complete backyard transformations. Serving Orlando, Winter Park, Lake Mary, and all of Central Florida with transparent pricing and premium quality. Schedule your free consultation today →
About Daydream Outdoor Living:
Daydream Outdoor Living is a licensed Florida contractor (CPC1460885) and CMHA Certified installer specializing in travertine pavers, custom pools, artificial turf, outdoor kitchens, and complete outdoor living transformations. We serve Orange, Seminole, Lake, Osceola, Volusia, and Brevard Counties with a focus on premium quality, professional installation, and customer satisfaction.
SEO Keywords: travertine pavers, travertine paver cost, travertine pool deck, travertine paver installation, travertine vs concrete pavers, travertine patio, travertine pavers Orlando, travertine pavers Florida, travertine paver prices, tumbled travertine pavers, travertine pool deck cost